
Documents
Tech Specs
Installation
Kits & Accessories
Operation
FAQs
I don’t see my fan’s light in the app.
If the light kit was installed while power to the fan was on, your fan and the app may not recognize the light properly. To resolve the issue, turn off power to the fan for 30 seconds using the circuit breaker or the wall switch. Restore power to the fan and attempt to control the light again.
How do I reset my fan’s network settings?
Note: A network reset will only re-broadcast the default Haiku Wi-Fi network. All your product names, rooms, events, and other settings will not be changed.
- Press and hold a power button (fan or light) on the remote for 5 seconds. After 5 seconds, the blue LED indicators will blink.

- Within 30 seconds of the LED indicators blinking, press the (plus) button on the remote. The fan will beep, and its LED indicators will blink rapidly.

- When the LED indicators stop blinking, the network reset is complete.
If the above sequence doesn’t work, bring your fan to a complete stop and try the following:
- On the remote, press the following button sequence: Whoosh, Whoosh, Clear, Timer, Fan On/Off.
- You will hear a beep after pressing each button, indicating that the fan received the command. Note: the fan will only beep if fan beeps were not turned off.
- When the network reset is accepted, the fan’s blue indicator lights will form a circle. Check your mobile device’s Wi-Fi settings to make sure the fan’s network is now visible.
- After a network reset, your fan’s custom settings (preferences, schedules, etc.) are retained.
How do I set up the Haiku app?
BEFORE SETTING UP THE APP
- Obtain your Wi-Fi router SSID (network name) and password. If you do not have a Wi-Fi network or you do not want to connect your Haiku products to your network, you can use the app to turn a Haiku product into a Wi-Fi access point. See Setting Up Your App below for instructions. Note: Haiku product Wi-Fi access points do not have an internet connection.
- Install and test your Haiku products. Make sure your products are receiving power. Use the provided remote to test fan and light functionality. See their respective installation guides for instructions on installing your product.
SETTING UP YOUR APP
IOS DEVICES:
- Download the Haiku App to your iOS device.
- Open the app.
- If this is your first time using Haiku, create an account.
- If you already have a Haiku account, sign-in, tap
 , and tap Add a Product.
- On the Let’s Set Up Your Product! screen, tap Let’s Go.
- Make sure your Haiku product is installed and powered on, then tap Next.
- When you see the Connect to Your Device screen, go to your device’s Settings app and navigate to Wi-Fi settings. Your Haiku product’s default network will appear in the list of available networks, and it will begin with the word Haiku (e.g. Haiku_L_AA:BB:CC).
- Tap on the Haiku product’s Wi-Fi network and wait for the Wi-Fi symbol to appear in the status menu at the top of the screen.
- Return to the Haiku Home app.
- Tap Set It Up, and follow the instructions to name your fan and assign it to a room.
- On the Connect Your Device screen, select I Have a Wi-Fi Network if you have an existing network in your home.
- If you don’t have a Wi-Fi network, click here to learn about setting up an AP network.
- On the next screen, select your Wi-Fi network from the list.
- Enter your Wi-Fi password, and tap Next.
- When the Haiku product successfully joins your network, you will see a Congratulations! message.
- If you receive a message stating that your Haiku product failed to join the network, see My fan failed to join my Wi-Fi network for further assistance.
Tap Add Another Device to connect other Haiku products to your home network.
Tap Finished Adding Devices if you don’t have any more Haiku products to connect right now.
ANDROID DEVICES:
Important: Before starting, make sure your Location Services and GPS are turned on in your mobile device’s settings.
- Download the Haiku App to your Android device.
- Open the app.
- If this is your first time using Haiku, create an account.
- If you already have a Haiku account, sign-in, tap , and tap Add a Product.
- On the Let’s Set Up Your Product! screen, tap Let’s Go.
- Make sure your Haiku product is installed and powered on, then tap Next.
- If you are using an Android device, you may be asked to allow location access. This lets us use the Wi-Fi radio in your phone/tablet to locate nearby Haiku devices that have not yet been set up.
- At the Connect to Your Product screen, select your Haiku product’s default network from the list of products (e.g. Haiku Fan (AA:BB:CC) – the characters inside the parentheses are each product’s unique identifier).
- From the Room Setup screen:
- Tap Add Room to create a new room.
- Select the room type.
- Name your room, then tap Next.
- Choose a previously-created room (if you have set up one or more Haiku products already).
- Be sure to place items that should work together (e.g. a fan and wall control) in the same room.
- Tap Add Room to create a new room.
- Name your Haiku product, then tap Next.
- On the Connect to Wi-Fi screen, select your Wi-Fi network from the list.
- Enter your Wi-Fi network password and tap Next.
- When the Haiku product successfully joins your network, you will see a Setup Complete! Message.
- If you receive a message stating that there seems to be a problem, see My fan failed to join my Wi-Fi network for further assistance.
Tap Add Another Product to connect other Haiku devices to your home network.
Tap Finished if you don’t have any more Haiku devices to connect right now.
I don’t have a Wi-Fi network, or I don’t want to connect my fan to my Wi-Fi network.
If you do not want to connect your fan to your Wi-Fi network or you do not have a Wi-Fi network, you can use the Haiku Home app to turn your fan into a Wi-Fi access point. You can create an access point during initial setup of the Haiku Home app or after app setup is complete.
Note: Fan Wi-Fi access points do not have an internet connection.
IOS DEVICES
To create an access point during initial app setup, tap I do NOT have a Wi-Fi network at the Connect Your Device screen.
-
- Follow the on-screen instructions to name your network and create a password. Tap Next.
- When instructed, go to your device’s Wi-Fi settings, and connect to your new network.
- Return to the Haiku Home app, scroll to the bottom of the screen, and tap Okay! I’m Back!
- If you wish to add other Haiku products to the network, tap Add Another Device. If not, tap Finished Adding Devices.
- Your Haiku fan is now an Access Point!
To create an access point after initial app setup.
-
- Tap , and then tap Rooms & Devices.
- Tap the name of the fan you want to use as an access point.
- Tap Network Configuration, and then tap Create Wi-Fi Network.
- Follow the on-screen instructions to name your network and create a password. Tap Next.
- When the network has been created, tap Done.
- Go to your mobile device’s Wi-Fi settings, and connect to your new network.
- To connect other Haiku products to the new network, tap , and then tap Add a Product.
- Tap
ANDROID DEVICES
To create an access point during initial app setup tap Create Wireless Network at the Connect to Wi-Fi screen.
-
- Follow the on-screen instructions to name your network and create a password. Tap Next.
- If you wish to add any other Haiku products to the network, tap Add Another Product. If not, tap Finished.
- Your Haiku fan is now an Access Point!
To create an access point after initial app setup:
-
- Tap , and then Settings.
- Tap Devices, then select the name of the fan you want to use as an access point.
- Tap Wi-Fi Settings, tap Wi-Fi, then select Create Wireless Network.
- Follow the on-screen instructions to name your network and create a password. Tap Next.
- To connect other Haiku products to the new network, tap , and then tap Add a Product.
- Tap
I have a new router, or my Wi-Fi network name or password has changed, and now I can’t control my fan.
If your Wi-Fi SSID (network name) or password has changed, or if you have a new router, your fan won’t be able to communicate with your router. To get them working together again, try the following:
- Reset your fan’s settings using the instructions here (Haiku fans) or here (es6 and i6 fans).
- Tap , and then tap Add a Product.
- Follow the on-screen prompts to connect your fan to the new Wi-Fi router. Make sure you know your new Wi-Fi SSID (network name) and password. For a more detailed look at the setup process, see the instructions here (Haiku fans) or here (es6 and i6 fans).
My fan failed to join my Wi-Fi network.
- Make sure you entered the correct Wi-Fi password during fan setup. Please note that Wi-Fi network names and passwords containing quotation marks (“) will not work with Big Ass fans.
- Make sure that your mobile device is connected to the same network to which you attempted to connect the fan.
- Make sure your fan is within range of your router. Check the router specifications for details about ranges and function.
If you have verified these conditions, but your fan still won’t connect to your network, reset your fan’s settings using the instructions here (Haiku fans) or here (es6 and i6 fans).
- After you’ve reset the fan’s settings, connect your mobile device to your home Wi-Fi network. In the app, tap , and then tap Add a Product.
- Follow the on-screen prompts to reconnect your fan to your Wi-Fi network. Make sure you have your Wi-Fi SSID (network name) and password ready.
I’m trying to connect my Haiku product to my Wi-Fi network, but I don’t see my network in the Haiku app.
- Make sure your network is password protected.*
- Make sure your network is compatible with 802.11 b/g/n. To confirm your network is compatible with 802.11 b/g/n, check your router settings or contact your router manufacturer.
- Make sure your network’s SSID is not hidden.
- Make sure your network is broadcasting in 2.4 GHz. 5 GHz networks are not supported and will not be displayed.
*WEP and open networks are not supported.
I don’t see my fan in the Haiku app.
- Check your mobile device’s Wi-Fi setting to make sure it’s connected to the same Wi-Fi network as your fan. If not, you won’t see your fan in the app.
- If you have not connected your fan to the app, check the Wi-Fi settings on your mobile device to see if the fan’s default network is broadcasting. If you see this network, set up the Haiku app and add your your fan.
- iOS devices: the Haiku network will take the format Haiku_L_AA:BB:CC
- Android devices: the Haiku network will take the format Haiku Fan (AA:BB:CC)
- If you already connected your fan to the app, it may have temporarily lost its network connection. Try each of the following, one at a time:
- Soft reset: On the remote, hold the power button for 5 seconds. When the blue LED ring lights up, release the power button.
- Power cycle: Turn off power to the fan for one minute using a light switch or circuit breaker, and then restore power.
- Network reset: See How to reset my fan’s network settings.
About Haiku
Is the Haiku app available for both iOS and Android?
What can I do with the Haiku app?
Note: To enable SenseME features for a Haiku L fan, you will need to install the Wi-Fi module in the fan’s control box and install the Haiku Wi-Fi Wall Control.
SMART MODE 
FANS
Select Auto Comfort settings Smarter Heating and Smarter Cooling to maintain comfort and maximize energy savings year-round. When paired with a smart thermostat, your fan will alternate between Smarter Heating and Smarter Cooling automatically.
LIGHTS
Enable Smarter Lighting, and Haiku Lights will adjust their brightness automatically as ambient light levels change throughout the day.
See How do I get my Haiku products to work automatically? for instructions.
SLEEP MODE 
Customize your sleep settings for all-night comfort at the touch of a button. See How do I enable my Haiku products’ Sleep settings? for instructions.
WHOOSH MODE 
Silently varies fan speed to mimic cooling natural breezes. See What is Whoosh Mode, and how does it work? for instructions.
ROOMS 
Group multiple Haiku products in the same space for synchronized operation. See How do I get my Haiku products to work together? for instructions.
SCHEDULING 
Sets precise schedules for fan and light control modes. See How do I make my Haiku products work on a schedule? for instructions.
MOTION SENSOR 
Detects when you enter or leave a room, turning the fans and lights in the room on and off automatically. See How do I enable the motion sensor on my Haiku products? for instructions.
HAIKU ACCOUNT
Create a Haiku account to automate your comfort using SenseME Technology. Using your account, you can also connect your Haiku products to compatible smart thermostats and Amazon Alexa-enabled devices. See How do I connect my Haiku products to my Haiku account? for instructions.
SMART THERMOSTATS 
When your Haiku fan is connected to a smart thermostat, they work together to reduce heating and cooling costs. See How do I get my Haiku fan to work with a smart thermostat? for instructions.
FAN ECO 
Activate Fan Eco to fully leverage the energy savings from your ceiling fan. See What is Fan Eco? for details and instructions.
What are the clearance guidelines for my fan?
Follow these clearance guidelines when installing your fan to avoid damage to the fan or its surroundings.
I’ve lost my remote.
Of course! You can order a new one here.
Controlling Haiku
What is Fan Eco?
Fan Eco is a mode in the Haiku app that allows you to fully leverage the energy savings from your ceiling fan. Toggle on Fan Eco to reduce your fan’s energy consumption in conditions that don’t require maximum air movement.
To enable Fan Eco:
- In the Haiku app, tap a fan or room name on the Home screen.
- Tap the settings icon in the top right corner of the screen.
- Toggle Fan Eco to enable it.
I scheduled an event for my fan, but the event occurs earlier or later than the specified time.
If you have connected your Haiku fan to your mobile device using the Haiku app, the fan’s internal clock is synchronized with the time on the mobile device. If your fan’s scheduled events are not occurring at the proper time, make sure the time on your mobile device is accurate, then re-launch the app.
How do I restore my fan’s factory settings?
Note: A factory reset will re-broadcast the default Haiku Wi-Fi network, clear any device and room names, delete existing scheduled events, and reset all other settings back to original values.
- Press and hold any power button (fan or light) on your remote for 5 seconds. After 5 seconds, the blue LED indicators will blink.
- Within 30 seconds of the LEDs blinking, press any
 minus button on your remote. The fan will beep, and its LEDs will blink rapidly.
 - When the LED indicators stop blinking, the factory reset is complete.
If the above reset sequence did not work, bring your fan to a complete stop and try the following:
- Press the following button sequence on the remote: Whoosh, Whoosh, Clear, Timer, Speed Down.
- You will hear a beep after pressing each button, indicating that the fan received the command.
- When the LED indicators stop blinking, the factory reset is complete. Check your mobile device’s Wi-Fi settings to make sure the fan’s network is now visible.
How do I disable my Haiku fan’s Wi-Fi signal?
Note: Disabling your Haiku products’ Wi-Fi signal will make it invisible in your mobile devices’ Wi-Fi settings and prevent connection to the Haiku app.
- Make sure your fan has firmware version 2.3.2 (or later). To see which firmware version your fan has, open the Haiku Home App, tap
 , then tap Update Firmware to see the firmware version of each connected Haiku product. If required, you can update your fan’s firmware from this screen.
 - Restore your fan to its factory settings.
- While pointing the remote at the fan, press and hold the fan ON/OFF button until the LED indicators blink.
- Within 30 seconds, press the “plus” button five times.
- The LED indicators will turn on briefly and then stop blinking. The fan’s Wi-Fi signal is now disabled.
Note: To re-enable the products’ Wi-Fi signal, complete a network reset using the remote control.
Can I reverse my fan using the IR remote?
Yes. However, Big Ass Fans does not recommend reversing your fan. Instead, run the fan on low speed settings to gently circulate air without creating a draft. Not convinced? Click here to find out why reversing your fan (especially in winter) isn’t necessary.
If you’d still like to reverse your fan, do the following:
- Bring the fan to a complete stop.
- On the IR remote, press Whoosh, Whoosh, Whoosh, Speed Up (or Fan Power).
What do the Whoosh, Timer, Sleep, and Clear buttons on the remote do?
- Whoosh mode varies fan speed up and down to simulate natural breezes. Set the fan to your maximum desired speed, and then press the Whoosh button. To exit Whoosh mode, press the On/Off button, manually change the fan speed, or press the Whoosh button again.
- Sleep, Timer, and Clear commands will vary between SenseME-enabled fans and non-SenseME fans.
I SERIES, HAIKU L WITH WI-FI MODULE, AND OTHER SENSEME-ENABLED FANS
- Sleep: Press the Sleep button to enable your Sleep Mode settings as specified in the Haiku app. Press again to disable Sleep settings.
- Timer: Press the Timer button once for every hour you want the fan to run. The fan will turn off after the selected number of hours. For example, pressing the Timer button five times will turn the fan off after five hours of run time.
- Clear: Press the Clear button to disable the Timer, if it’s currently active.
HAIKU L FANS WITHOUT WI-FI MODULE
- Sleep: Press the Sleep button to set an eight-hour timer. The fan will decrease in speed each hour until it reaches Speed 1. The fan will turn off automatically after eight hours.
HAIKU C, NON-SENSEME ENABLED FANS (EXCLUDING HAIKU L)
- Timer: Press the Timer button once for every hour you want the fan to run. The fan will turn off after the selected number of hours. For example, pressing the Timer button five times will turn the fan off after five hours of run time.
- Sleep: Press the Sleep button when the Timer is enabled, and the fan will decrease its speed once per hour until it reaches Speed 1 or until the timer ends.
- Clear: Press the Clear button to disable the Timer or Sleep Mode.
How do I reverse my fan?
Note: Big Ass Fans recommends never reversing your fan—just run it at a slow forward speed during the winter to keep your space evenly comfortable from floor to ceiling. Go here to learn more about destratification.
USING THE REMOTE:
Bring the fan to a complete stop, and then press the following button sequence on the remote: Whoosh, Whoosh, Whoosh, Speed Up (or fan On/Off). Repeat to return the fan to forward operation.
USING THE HAIKU APP:
IOS
- Bring the fan to a complete stop.
- In the Haiku Home app, tap , then tap Rooms & Devices.
- Select the fan you wish to reverse.
- Toggle the Reverse Fan switch to enable or disable reverse.
ANDROID
- Bring the fan to a complete stop.
- In the Haiku Home app, tap , then tap Settings.
- Tap Devices and select the fan you wish to reverse.
- Toggle the Reverse Fan switch to enable or disable reverse.
What is Whoosh Mode, and how does it work?
Whoosh® Mode silently varies fan speed to mimic cooling natural breezes. Enable Whoosh Mode to enjoy the feeling of fresh air on a warm day—or any time you feel like it.
ENABLING WHOOSH MODE
- In the Haiku app, tap a room on the Home screen, and then tap
 .
. - Toggle Whoosh to enable it, and then tap Done.
DISABLING WHOOSH MODE
- In the Haiku app, tap a room on the Home screen, and then tap.
- Toggle Whoosh to disable it, and then tap Done.
How do I enable my Haiku products’ Sleep settings?
Sleep Mode lets you choose unique fan settings for personalized nighttime comfort. When Sleep Mode is on, all other features are disabled—nothing should disturb your sleep, including your ceiling fan.
When you enable Sleep Mode, all schedules, modes, and the motion sensor will be disabled, and the fan light will turn off. If you use the app, remote, or Haiku Wi-Fi Wall Control to turn the light back on during the night, Sleep Mode will be disabled.
Note: To enable SenseME features for a Haiku L fan, you will need to install the Wi-Fi module in the fan’s control box and install the Haiku Wi-Fi Wall Control.
ADJUSTING SLEEP MODE SETTINGS
- In the Haiku app, tap a room on the Home screen, and then tap
 .
. - Tap Sleep Settings.
- Select your ideal sleeping temperature.
This is the temperature the fan will attempt to simulate while you sleep. The fan will analyze ambient temperature and humidity, and it will adjust its speed to keep you comfortable throughout the night. - Set the Min Speed and Max Speed to your desired minimum and maximum fan speeds.
When the fan is in Sleep Mode, it will run at your selected minimum speed whenever the room temperature is at or below your ideal sleeping temperature. The fan will not run above your selected maximum speed when it is in Sleep Mode. - Tap the back button, and then tap Wake Up Settings.
- Toggle Light to enable it if you want the light to turn on when you disable Sleep Mode. Drag the slider to the desired light brightness.
- Tap the back button, and then tap Done.
USING SLEEP MODE
- In the Haiku app, tap a room on the Home screen, and then tap.
- When you are ready to fall asleep, toggle Sleep Mode to enable it.
You can also press the Sleep button on the remote. The fan will adjust to achieve your ideal comfort level throughout the night. - When you wake up, toggle Sleep Mode to disable it.
You can also press the Sleep button on the remote. The fan will resume the speed it was at before you went to sleep, and the light will turn on, if enabled. - Tap Done.
How do I make my Haiku products work on a schedule?
The Scheduling feature sets precise schedules for fan and light control modes. Schedule an event to include an app feature when you know you’ll need it—or disable it when you won’t. Set your lights to turn on while you’re on vacation, or disable the motion sensor at night.
Note: Available scheduling features depend on the types of products the room contains. You may not see all of the options shown below.
CREATING A NEW SCHEDULED EVENT
- In the Haiku app, tap a room on the Home screen, and then tap
 .
. - Tap
 .
. - Select the days on which the scheduled event should occur and the time at which the event should start. Dark bubbles indicate the days on which the event will occur.
- Select the features that will be included in the scheduled event. Bubbles with check marks indicate selected features. Options for each selected feature appear at the bottom of the screen.
- Scroll down to view all feature options. Select the features you wish to enable or disable as part of the event, and set feature options.
- Tap Create, and then tap Done.
DELETING A SCHEDULED EVENT
- In the Haiku app, tap a room on the Home screen, and then tap .
- Tap the scheduled event, and then tap Delete in the top right corner.
- Tap Delete to confirm, and then tap Done.
HOW DO I SCHEDULE A FAN OR LIGHT TO TURN OFF?
- In the Haiku app, tap a room on the Home screen, then tap .
- Tap .
- Select the days on which the fan and/or light should turn off and the time at which it should happen.
- Tap to select the Fan and/or Light bubble.
- Tap Mode for the fan and/or light, and choose Off.
- Tap Create, and then tap Done.
WHAT HAPPENS IF I ADD A PRODUCT WITH A SCHEDULE TO A ROOM THAT HAS A DIFFERENT SCHEDULE?
If there is a scheduling conflict between the product and the room, the room schedule will override the product’s individual schedule.
How do I get my Haiku products to work together?
To get your Haiku products to work together, make sure that you place them in the same “room” when you first connect each one to the Haiku app.
Follow the instructions below to make adjustments to your “rooms” to suit your preferences.
ADDING A ROOM
IOS
- In the Haiku app, tap , and then tap Rooms & Devices
- Tap Edit, and then tap.
- Specify the room type and name, and then tap Save.
- Drag the product(s) you want to add to the room under the room heading.
- Tap Done twice to return to the Home screen.
ANDROID
- In the Haiku app, tap , then tap Settings and select Rooms.
- Tap the button in the top right corner and select Add Room.
- Give your room a name, choose a room type, and select which devices are included in this room, then tap OK.
- Tap the back button to return to Room Settings and verify that your new room has been created.
Note: You must assign a Haiku product to a newly-created room. If you create a new room but leave Rooms & Devices before adding a product, the new room will be deleted.
DELETING A ROOM
IOS
- In the Haiku app, tap , and then tap Rooms & Devices.
- Tap Edit.
- Drag all products out from under the room heading you want to delete.
- Tap Done twice to return to the Home screen. The room is removed from the Home screen.
ANDROID
- In the Haiku app, tap , then tap Settings and select Rooms.
- Select the room you wish to delete.
- Tap Included Devices and uncheck each device in the list.
- Tap OK, then tap the back button to verify that the room has been deleted.
MOVING A PRODUCT TO A DIFFERENT ROOM
IOS
- In the Haiku app, tap , and then tap Rooms & Devices.
- Tap Edit.
- Drag the product under the desired room heading.
- Tap Done twice to return to the Home screen.
ANDROID
- In the Haiku app, select the destination room from the Home screen.
- Tap the button in the top right corner of this screen and select Room Settings.
- Tap Included Devices, then tap the checkboxes next to the names of the devices you want to be in this room.
- Tap OK.
EDITING ROOM DETAILS
IOS
- In the Haiku app, tap , and then tap Rooms & Devices.
- Tap
 next to the room name.
 - Edit the room type or name, and then tap the back button.
- Tap Done to return to the Home screen.
ANDROID
- In the Haiku app, select the room you wish to edit from the Home screen.
- Tap the button in the top right corner of this screen and select Room Settings.
- Make the desired edits.
ROOM CONTROL SCREENS
Tap a room on the Home screen to access the Room Control screen. You can simultaneously control all Haiku products in a room from the Room Control screen. Tap a feature icon at the bottom of the Room Control screen to access the feature control screen.
Note: The features available depend on the types of products the room contains.
How do I reboot (power cycle) my fan using the remote?
- Press and hold the fan On/Off button until the fan’s LED indicators start blinking.
- Within 30 seconds of the LEDs flashing on, press the fan On/Off button again to complete the reboot.
- When the LED indicators stop blinking, the reboot is complete.

How do I get my Haiku fan to work with a smart thermostat?
With your Haiku account, you can pair your Haiku products with your smart thermostats to increase energy savings and live more comfortably. When your Haiku fan is connected with a smart thermostat, they work together to reduce heating and cooling costs.
To pair your Haiku fans with a smart thermostat, sign into your Haiku account and make sure your fans are connected to the account. See How do I connect my Haiku products to my Haiku account for instructions.
Note: Haiku fans currently work with ecobee smart thermostats. To pair your Haiku L fan with a smart thermostat, you must have a Haiku Wireless Wall Control and Haiku L Wi-Fi module.
PAIRING A SMART THERMOSTAT WITH A FAN
- Follow the instructions included with the thermostat to install the thermostat and set up your thermostat account. Remember your password — you will need it later.
- Open the Haiku app. Tap , then tap Smart Home Integration and select Add Thermostat Integration. If you are not signed in to a Haiku Home account, you will be prompted to create or sign in to an account.
- Select your thermostat type, and then follow the on-screen instructions to sign in to your account. It may take a few seconds for the sign-in screen to load.
- When prompted, select the thermostat you want to pair with your fan, then tap Next.
- When prompted, select the fan you want to pair with your thermostat, then tap Next. All fans assigned to the connected fan’s room will follow your Smart Mode settings.
- Set your ideal temperature, minimum fan speed, and maximum fan speed, then tap Next.
- On the Setup Complete screen, tap Done. Your thermostat is now paired with your fan.
MANAGING THERMOSTATS AND FANS
- In the Haiku app, tap , then tap Smart Home Integration and select Add Thermostat Integration.
- Select your thermostat type.
- When prompted, select the thermostat you want to pair with your fan, then tap Next.
- When prompted, select the fan you want to pair with your thermostat, then tap Next. All fans assigned to the connected fan’s room will follow your Smart Mode settings.
- Set your ideal temperature, minimum fan speed, and maximum fan speed, then tap Next.
- On the Setup Complete screen, tap Done. Your thermostat is now paired with your fan.
CONNECTING AN ADDITIONAL SMART THERMOSTAT ACCOUNT
- In the Haiku app, tap , then tap Smart Home Integration and select Add Thermostat Integration.
- Follow the on-screen instructions to connect your new account.
WHY DOESN’T MY THERMOSTAT RESPOND INSTANTLY?
- It takes up to 60 seconds for the thermostat to receive and process a command from the app.
CAN I CONNECT MORE THAN ONE FAN TO MY THERMOSTAT?
- Not exactly. When you pair a Haiku fan with a smart thermostat, all other fans assigned to that fan’s room will follow your Auto Comfort settings. The Smart Thermostat settings will only note the connection to a single fan, however.
How do I enable the motion sensor on my Haiku products?
The motion sensor detects when you enter or leave a room, turning the fans, lights, or both on and off automatically. Schedule the motion sensor to disable when you know you’ll be away from home so that it doesn’t turn on every time the cat walks into the room.
When the motion sensor is enabled for a room, all fans and lights in the room will simultaneously turn on or off when motion is detected. Use this feature in larger spaces instead of turning on the fans and lights each time you enter the room.
Note: Your fans or lights must be on when you leave the room if you want it to turn on when you re-enter the room. If the fan or light was turned off manually when you left, it will remain off when you return.
Note: The ![]() Fan setting is available only if the room contains fans. The
Fan setting is available only if the room contains fans. The ![]() Light setting is available only if the room contains fans with lights, Haiku Lights, or both.
Light setting is available only if the room contains fans with lights, Haiku Lights, or both.
Note: To enable SenseME features for a Haiku L fan, you will need to install the Wi-Fi module in the fan’s control box and install the Haiku Wi-Fi Wall Control.
ENABLING THE MOTION SENSOR
- In the Haiku app, tap a room on the Home screen, and then tap
 .
. - If you want the fans in the room to turn on when motion is detected and off when no motion is detected, toggle Fan to enable it.
The Fan setting is available only if the room contains fans. - If you want the lights in the room to turn on when motion is detected and off when no motion is detected, toggle Light to enable it.
The Light setting is available only if the room contains fans with lights, Haiku Lights, or both. - Tap Turn Off After, and then select how long the fans, lights, or both should stay on after motion is no longer detected. The minimum setting is one minute.
- Tap Done.
DISABLING THE MOTION SENSOR
- In the Haiku app, tap a room on the Home screen, and then tap .
- Toggle Fan, Light, or both to disable them. The fans and lights will stop detecting your presence in the room and will no longer respond to motion.
- Tap Done.
How do I get my Haiku products to work automatically?
Haiku fans and lights can be set to work automatically by enabling their motion sensors and/or Smart Mode settings in the Haiku app.
Follow the instructions below to program and adjust these settings.
Note: To enable SenseME features for a Haiku L fan, you will need to install the Wi-Fi module in the fan’s control box and install the Haiku Wi-Fi Wall Control (the Haiku L wall control is no longer available for purchase).
ENABLING THE MOTION SENSOR
Note: your fan or light must be on when you leave the room if you want it to turn on when you re-enter the room. If it was turned off manually when you left, it will remain off when you return.
- In the Haiku app, tap a room on the Home screen, and then tap .
- If you want the fans in the room to turn on when motion is detected and off when no motion is detected, toggle Fan to enable it.
The Fan Sensor Enabled setting is available only if the room contains fans.
- If you want the lights in the room to turn on when motion is detected and off when no motion is detected, toggle Light to enable it.
The Light Sensor Enabled setting is available only if the room contains fans with lights, Haiku Lights, or both.
- Tap Turn Off After, and then select how long the fans, lights, or both should stay on after motion is no longer detected. The minimum setting is one minute.
DISABLING THE MOTION SENSOR
- In the Haiku app, tap a room on the Home screen, and then tap .
- Toggle Fan, Light, or both to disable them. The fans and lights will stop detecting your presence in the room and will no longer respond to motion.
ENABLING SMARTER COOLING
Set your ideal temperature, and the fan will automatically adjust to find the most comfortable speed during Smarter Cooling. Be sure to set your minimum and maximum fan speeds.
- In the Haiku app, tap a room on the Home screen, and then tap
 .
. - Select Cooling from the Auto Comfort drop-down.
- Select your ideal temperature.
- This temperature reflects your ideal comfort level. When you enable Auto Comfort, your fan will analyze ambient temperature and humidity, adjusting its speed automatically to keep you comfortable.
- Tap Min Speed and Max Speed to set your desired minimum and maximum fan speeds.
- During Smarter Cooling, the fan will run at your selected minimum speed whenever the room temperature is at or below your ideal temperature. The fan will not run above your selected maximum speed during Smarter Cooling.
- Tap Done. The Fan slider on the Room Control screen will indicate that Smarter Cooling is enabled.
ENABLING SMARTER HEATING
Smarter Heating saves you up to 25 percent on your heating bills by recirculating the heat trapped at the ceiling. When you enter the room, your fan will spin slowly, gently pushing hot air down to your level without creating a draft. When you leave the room, Smarter Heating signals the fan to speed up, mixing the warm air in the space.
- In the Haiku app, tap a room on the Home screen, and then tap .
- Select Heating from the Auto Comfort tab.
- When you enter the room, the fan will spin slowly, gently pushing hot air down to your level without creating a draft. When you leave the room, the fan will speed up automatically, mixing the warm air in the space.
- The Ideal Temperature and Min & Max settings are disabled during Smarter Heating.
- Tap Done. The Fan slider on the Room Control screen will indicate that Smarter Heating is enabled.
ENABLING SMARTER LIGHTING
Smarter Lighting mode automatically adjusts Haiku Light’s brightness level as ambient light levels change (when the afternoon sun hits your living room, for example) throughout the day. When you set your ideal light brightness, Haiku Light takes a “snapshot” of the room’s current lighting levels, and adjusts to keep the room lit to your preference. If you manually adjust your light’s brightness, Smarter Lighting will update to match your new preference. Smarter Lighting is only available on Haiku Lights.
- In the Haiku app, tap a room on the Home screen, and then tap .
- Toggle on Smarter Lighting.
- Use Min Brightness and Max Brightness to set your ideal room brightness and your light’s minimum and maximum brightness levels.
- Tap Done.
ENABLING YOUR SMART THERMOSTAT SETTINGS
See Smart Thermostats for instructions on pairing a smart thermostat with your fan.
- In the Haiku Home app, tap a room on the Home screen, and then tap .
- Select the appropriate smart thermostat setting (Works with Nest or ecobee pairing) from the Auto Comfort tab.
- When your thermostat switches to cooling or heating mode, it will automatically signal the fan to switch to Smarter Cooling or Smarter Heating.
- Tap Done.
DISABLING AUTO COMFORT
- In the Haiku Home app, tap a room on the Home screen, and then tap .
- Under Auto Comfort, select Off.
- Tap Done.
How do I connect my Haiku products to my Haiku account?
To pair your Haiku products with third-party devices like Amazon Echo, Nest Learning Thermostat, and ecobee smart thermostat, they must be connected to your Haiku account.
CONNECTING HAIKU PRODUCTS TO YOUR HAIKU ACCOUNT
To connect a Haiku product to your Haiku account, the product must be connected to the app and your home Wi-Fi network. Your mobile device must also be connected to your home Wi-Fi network. See How do I set up the Haiku app? for instructions.
- In the Haiku app, tap , then tap Smart Home Integration (iOS) or Integrations (Android).
- Under Other Haiku Devices, tap + next to the product to connect it to your account.
- The product will be added under My Haiku Devices.
REMOVING HAIKU PRODUCTS FROM YOUR HAIKU ACCOUNT
- In the Haiku app, tap , then tap Smart Home Integration.
- Under My Haiku Devices, tap the product you want to remove.
- iOS: Tap Remove
- Android: Tap the button in the top right corner of the screen and select Remove.
The product is now listed under Other Haiku Devices. You can reconnect the product to your account any time you are connected to your home Wi-Fi network by tapping + next to the product name under Other Haiku Devices.
My remote is not controlling my fan.
Note: Since our IR remotes are universally programmed, no “pairing” is required. However, if you’re having trouble getting your remote to work, try the following:
- Make sure the clear plastic battery tab has been removed, a working battery is installed, you are within range, and you have direct line of sight to the fan/light you’re attempting to control.
- If the remote still does not work after satisfying the above requirements, there may be a another issue (see instructions below).
FOR HAIKU FANS AND HAIKU I SERIES FANS, TRY THE FOLLOWING:
- Verify that the fan is receiving power by power cycling the fan. To do this:
- Cut power to the fan via standard on/off wall switch, or the breaker if standard wall switch is not applicable.
- Wait at least 5 minutes, and then restore power.
- The fan will beep once as it powers on (unless you have disabled beeps in the app) and blue LEDs on the bottom of the motor may light up.
- If you do not hear a beep, verify that the fan is wired correctly, as shown in the installation guide.
- If you do hear the fan beep during a power cycle, stand directly beneath the fan and attempt to use the IR remote. Depending on fan height and installation location, IR range can vary.
- If you’ve followed these steps and are still unable to use your IR remote, please give us a call.
FOR HAIKU L AND HAIKU C FANS, TRY THE FOLLOWING:
Verify all ground wiring and motor harness connections are secure.
- Make sure that the yellow clip is connected to the fan motor.
- Motor post ground screw should be connected at the extension tube base.
- Make sure the green identification sticker has been removed.
- Make sure that Upper extension tube ground wire is secured to outside of mounting bracket hex screw.
- Make sure that the control box wiring harness ground, upper mounting bracket ground, and supply ground are connected.
- Unplug and reseat 5-pin connector and 3-pin connector at the control box.
- Unplug and reseat 3-pin connector and 2-pin connector at motor housing cover.
- Check IR filter connection at motor. This harness can sometimes be installed backward.
- Verify the colored wires are lined up properly (red to red, black to black, purple to purple).
- The clip on the extension tube harness should seat against the notch in the motor’s IR filter connector.
How do I control my fan with my smartphone or tablet?
IOS DEVICES:
- Download the Haiku Home App to your iOS device.
- Open the app.
- If this is your first time using Haiku Home, create an account.
- If you already have a Haiku Home account, sign-in, Tap , and tap Add a Product.
- On the Let’s Set Up Your Product! screen, tap Let’s Go.
- Make sure your fan is installed and powered on, then tap Next.
- When you see the Connect to Your Device screen, go to your device’s Settings app and navigate to Wi-Fi settings. Your fan’s default network will appear in the list of available networks, and it will begin with the word Haiku (e.g. Haiku_L_AA:BB:CC).
- Tap on the fan’s Wi-Fi network and wait for the Wi-Fi symbol to appear in the status menu at the top of the screen.
- Return to the Haiku Home app.
- Tap Set It Up, then follow the instructions to name your fan and assign it to a room.
- On the Connect Your Device screen, select I Have a Wi-Fi Network if you have an existing network in your home.
- If you don’t have a Wi-Fi network, click here to learn about setting up an AP network.
- On the next screen, select your Wi-Fi network from the list.
- Enter your Wi-Fi password, and tap Next.
- When the fan successfully joins your network, you will see a Congratulations! message.
- If you receive a message stating that your fan failed to join the network, see My fan failed to join my Wi-Fi network for further assistance.
Tap Add Another Device to connect other Haiku products to your home network.
Tap Finished Adding Devices if you don’t have any more Haiku products to connect right now.
ANDROID DEVICES:
Important: Before starting, make sure your Location Services and GPS are turned on in your mobile device’s settings.
- Download the Haiku Home App to your Android device.
- Open the app.
- If this is your first time using Haiku Home, create an account.
- If you already have a Haiku Home account, sign-in, tap , and tap Add a Product.
- On the Let’s Set Up Your Product! screen, tap Let’s Go.
- Make sure your fan is installed and powered on, then tap Next.
- If you are using an Android device, you may be asked to allow location access. This lets us use the Wi-Fi radio in your phone/tablet to locate nearby Haiku devices that have not yet been set up.
- At the Connect to Your Product screen, select your fan’s default network from the list of products (e.g. Haiku Fan (AA:BB:CC) – the characters inside the parentheses are each product’s unique identifier).
- From the Room Setup screen:
- Tap Add Room to create a new room.
- Select the room type.
- Name your room, then tap Next.
- Choose a previously-created room (if you have set up one or more Haiku products already).
- Be sure to place items that should work together (e.g. a fan and wall control) in the same room.
- Tap Add Room to create a new room.
- Name your fan, then tap Next.
- On the Connect to Wi-Fi screen, select your Wi-Fi network from the list.
- Enter your Wi-Fi network password and tap Next.
- When the fan successfully joins your network, you will see a Setup Complete! Message.
- If you receive a message stating that there seems to be a problem, see My fan failed to join my Wi-Fi network for further assistance.
Tap Add Another Product to connect other Haiku devices to your home network.
Tap Finished if you don’t have any more Haiku devices to connect right now.
Can I adjust how my Haiku products are configured?
Follow the instructions below to view and adjust your Haiku products’ configurations.
Note for Android users: Some of the configuration details below may be found in the Rooms section of the Settings menu.
ACCESSING CONFIGURATION DETAILS
- In the Haiku Home app, tap , and then tap Rooms & Devices.
- On Android, tap , then tap Settings, and select Devices.
- On Android, tap
- Tap the name of a product.
- Adjust the Configuration Details as described below.
VIEWING AND ADJUSTING FAN CONFIGURATION DETAILS
Name
Change the name of the fan.
Fan Height
Specify the fan height. This is the approximate distance between the floor and the fan’s airfoils.
Network Configuration (Wi-Fi Settings on Android)
View and control network information, including the fan’s IP address and Wi-Fi network. Create and set up an access point.
Reverse Fan
Toggle to reverse the direction of fan rotation. The fan must be stopped before reversing.
LED Indicators
Toggle to disable/enable the LED indicators located on the bottom of the fan
Fan Beep
Toggle to disable/enable the fan beeps, which sound when fan speed or an app setting is changed
Firmware Version
The fan’s firmware version
Device Type
The Haiku product type
MAC ID
The MAC address is the unique network identifier for the fan.
Local Time (Date & Time on Android)
The device’s date & time settings are used for scheduling. These are set automatically, when your device is first connected to a Wi-Fi network.
VIEWING AND ADJUSTING LIGHT CONFIGURATION DETAILS
Name
Change the name of the light.
Firmware Version
The light’s firmware version
Device Type
The Haiku product type
Network Configuration (Wi-Fi Settings on Android)
View and control network information, including the light’s IP address and Wi-Fi network. Create and set up an access point.
MAC ID
The MAC address is the unique network identifier for the light.
Local Time (Date & Time on Android)
The device’s date & time settings are used for scheduling. These are set automatically, when your device is first connected to a Wi-Fi network.
Smart Home Integrations
Logitech Harmony: How do I add Haiku remote commands to my Harmony remote or hub?
After following the steps below to add your Haiku product(s) to your Harmony remote or hub, follow the appropriate steps for your remote to add the commands to remote buttons or Activities.
- In the Harmony app, select the desired Harmony remote or hub, and then tap Devices > Edit Devices > + Device > ENTERTAINMENT DEVICE.
- In the Manufacturer Name field, start typing “Big,” and then select BigAssFans.
- In the Model Number field, type “Haiku,” and then tap ADD. This selection will be synced with your Harmony account.
- If necessary, point the Harmony remote at the desired Haiku product. Test basic power control by tapping POWER ON.
- If the Haiku product turns on, tap YES when asked if your product powered on. Note: If the only product you are controlling is a Haiku Light, the power on test may not work. Tap YES anyway and proceed with the remaining steps. You can confirm proper operation later.
- Skip the screen explaining infrared languages by tapping the arrow in the top right corner of the screen.
- When prompted to create an Activity for your Haiku product, tap YES. We recommend creating an Activity for easier control of your Haiku products.
- On the Suggested Activities screen, tap Add your own Activity.
- On the Activity screen, enter a name for the Activity and select an icon. Tap the arrow in the top right corner of the screen to proceed.
- On the Select Devices screen, select the BigAssFans Climate Control device, and then tap the arrow in the top right corner of the screen.
- On the Power on Devices screen, tap the ON button. When the Haiku product turns on, tap MY DEVICES ARE ON. The changes will be synced. Note: If the only product you are controlling is a Haiku Light, the power on devices step may not work. Tap YES anyway and proceed with the remaining steps. You can confirm proper operation later.
- On the Test Activity screen, tap TEST NOW. The Activity should turn the Haiku product on and off.
- After the test, tap YES if the Haiku product reacted to the Activity.
- On the next screen, select the BigAssFans Climate Control Activity, and then confirm that all Haiku product remote control functions are available. You can now add the commands to buttons in your Harmony app or remote and use them to control your Haiku products!
Google Assistant: How do I control my Haiku products with Google Assistant?
SETUP INSTRUCTIONS
- Download the Google Home app (iOS or Android) and verify that your Google Assistant-enabled device is set up and ready for use.
- Verify that your Haiku fans and lights are receiving power.
- In the Haiku app, tap and select Smart Home Integration (iOS app) or Integrations (Android app). Make sure you are signed in to your Haiku account and your Haiku products are listed under My Haiku Devices. Note: If you don’t have a Haiku Account, tap , select Smart Home Integration, and follow the on-screen instructions to create one.
- Open the Google Home app.
- Select the Home you are using, and then tap Add > Set up device > Works with Google.
- Search for and select “Big Ass Fans”.
- Sign in to your Haiku account and authorize Google to use it. Wait for Google Assistant to sync with your Haiku account. Note: You must use the same email account and password used in the Haiku app for Google Assistant to sync with your Haiku products and Rooms.
- Select Haiku products to add to new or existing Google Rooms (recommended), and then close the Rooms screen.
- You can now control your Haiku fans and lights using Google Assistant voice commands or the controls in the Google Home app.
THINGS TO TRY
For fans:
- “OK Google, turn on my living room fan.”
- “OK Google, turn off my living room fan.”
- “OK Google, set my living room fan to 50%.”
- “OK Google, turn up my living room fan.”
- “OK Google, turn down my living room fan.”
For lights:
- “OK Google, is the living room light on?”
- “OK Google, turn on my living room light.”
- “OK Google, turn off my living room light.”
- “OK Google, set my living room light to 80%.”
- “OK Google, brighten my living room light.”
- “OK Google, dim my living room light.”
THIRD-PARTY INTEGRATIONS
- Connect your Haiku products to Google Assistant.
- Connect your other lights and/or switches to Google Assistant.
- In the Google Home app, go to your Account page, and then tap Settings > Assistant > Home control > ROOMS.
- Tap + to add a room and select the products you want to include in it.
- Save your room.
- Use Google Assistant voice commands to control your devices and rooms.
Google Assistant: What kinds of voice commands can I use to control my Haiku products?
Big Ass Fans recommends using Google Home Room names that match the room names you provided in the Haiku app. Google Assistant will recognize the following command formats:
For fans:
- “OK Google, turn on my living room fan.”
- “OK Google, turn off my living room fan.”
- “OK Google, set my living room fan to 50%.”
- “OK Google, turn up my living room fan.”
- “OK Google, turn down my living room fan.”
For lights:
- “OK Google, is the living room light on?”
- “OK Google, turn on my living room light.”
- “OK Google, turn off my living room light.”
- “OK Google, set my living room light to 80%.”
- “OK Google, brighten my living room light.”
- “OK Google, dim my living room light.”
Note: At this time, you can control power, light brightness, and fan speed using voice commands. Google Assistant cannot make changes to other settings such as Smart Mode, Motion, Whoosh, or color temperature.
Amazon Alexa: How do I control my Haiku products with Amazon Alexa?
Note: Voice control of Haiku fans and lights requires a Wi-Fi connection and an Alexa-enabled device like Echo, Dot, or Fire Stick.
SETUP INSTRUCTIONS
- Download the Amazon Alexa app (iOS or Android) and verify your Alexa device is set up and ready for use.
- Verify that your Haiku fans and lights are receiving power.
- In the Haiku app, tap and select Smart Home Integration. Make sure you are signed in to your Haiku account and your Haiku devices are listed under My Haiku Devices.
- Note: If you don’t have a Haiku Account, tap , select Smart Home Integration, and follow the on-screen instructions to create one.
- Note: If you don’t have a Haiku Account, tap
- Open the Alexa app, go to the Menu, then select Skills and Games.
- Search for “Big Ass Fans” and select Enable.
- You will now be prompted to sign in to your Haiku account and authorize its connection to Alexa.
- Note: You must use the same email account and password used in the Haiku app for Alexa to discover your Haiku products and Rooms.
- Tell Alexa to discover your devices.
- After discovery is complete, you can control your Haiku fans and lights using voice commands.
THINGS TO TRY
For fans:
- “Alexa, turn on my family room fan.”
- “Alexa, turn off my family room fan.”
- “Alexa, set my family room fan to 30%.”
- “Alexa, turn up my family room fan.”
- “Alexa, turn down my family room fan.”
For lights:
- “Alexa, turn on my family room light.”
- “Alexa, turn off my family room light.”
- “Alexa, set my family room light to 80%.”
- “Alexa, brighten my family room light.”
- “Alexa, dim my family room light.”
THIRD-PARTY INTEGRATIONS
- Connect your Haiku products to Alexa.
- Connect your other lights and/or switches to Alexa.
- In the Alexa app, tap , and then tap Smart Home
- Under Groups, create a group that includes your Haiku products and smart home devices that you want to work together.
- Use Alexa’s voice commands to control your groups.
Amazon Alexa: What kinds of voice commands can I use to control my Haiku products?
Once Alexa discovers your Haiku fans or lights, it assigns room names based on the room names you provided in the Haiku app. Alexa will recognize the following command formats:
- “Alexa, turn on/off my family room fan.”
- “Alexa, set my family room fan to speed 30%.”
- “Alexa, turn up/down my family room fan.”
- “Alexa, turn on/off my family room light.”
- “Alexa, set my family room light to 80%.”
- “Alexa, brighten/dim my family room light.”
Note: At this time, you can control power, light brightness, and fan speed using voice commands. Alexa cannot make changes to other settings such as Smart Mode, Motion, Whoosh, or color temperature.
Amazon Alexa: Alexa recognizes my voice command, but asks me to clarify which Haiku product I want to control.
This typically means there are two entries for one Haiku device in Alexa’s database, or that two separate fans, lights, or rooms have the same name in the Haiku app. For example, you may have named two rooms “Bedroom” in the Haiku app.
To verify or change a room/device name:
IOS
- Open the Haiku app and verify the correct devices are being displayed with unique room/device names.
- Rename any device or room by tapping and selecting Rooms & Devices.
- To rename a room, tap the next to the room name, then tap the room name itself to edit.
- To rename a device, tap the device name, then tap it again on the following screen to edit.
ANDROID
- Open the Haiku app and verify the correct devices are being displayed with unique room/device names.
- Rename any device or room by tapping and selecting Settings.
- Select Rooms or Devices (depending on which you’d like to rename).
- Tap the room or device to be renamed.
- Tap the name to change it.
To disconnect a Haiku fan or light from your Haiku account:
IOS
- From the Home screen, tap , then select Smart Home Integration.
- Under the My Haiku Devices header, tap the device you wish to disconnect from your account.
- Tap Remove.
ANDROID
- From the Home screen, tap , then select Smart Home Integration.
- Under the My Haiku Devices header, tap the device you wish to disconnect from your account.
- Tap the button in the top right corner and select Remove.
Once the appropriate changes are made in the Haiku app, go the Settings menu in the Alexa app, tap Smart Home, and then tap Discover Devices.
Note: you can also control groups of Haiku products using Alexa groups in the Alexa app. See the Amazon Alexa app for more details.
Amazon Alexa: Alexa isn’t discovering my Haiku Fans or Lights. What do I do?
In order for Alexa to discover Haiku devices, the Alexa skill must be linked to your Haiku account, and your Haiku devices must be claimed under the associated Haiku account.
- Tap and select Smart Home Integration from the menu. Scroll down to My Haiku Devices. The devices listed here should be discovered by Alexa.
- Any device with a + next to its name is unclaimed and will not be discovered by Alexa.
- Tap the + to claim the device under your Haiku account, wait a few minutes, and ask Alexa to discover your devices again.
When enabling the Big Ass Fans skill in the Alexa app, you must link the skill to your Haiku account using the same email address and password you use in the Haiku app.
Amazon Alexa: How do I disconnect my Haiku products from Amazon Alexa?
To disconnect your Haiku fans and lights from Alexa and unlink your Haiku and Alexa accounts:
- Open the Alexa app.
- Tap the Devices icon in the menu at the bottom of the screen.
- On the Devices page, tap Your Smart Home Skills.
- Tap Big Ass Fans in the list.
- Tap Disable Skill, then tap it again on the following screen to confirm.
Trouble with Something Else
How do I silence the fan beep or turn off the LED indicators?
IOS
- In the Haiku Home app, tap , then tap Rooms & Devices.
- Tap the name of the fan you wish to modify.
- Toggle Fan Beep or LED Indicators OFF to disable (or ON to enable) the desired settings.
ANDROID
- In the Haiku Home app, select a room from the Home screen.
- Tap the button in the top right corner of the room screen and select Room Settings.
- Toggle Fan Beep or LED Indicators OFF to disable (or ON to enable) the desired settings.
How do I update my Haiku products’ firmware?
UPDATING YOUR HAIKU PRODUCTS
When new or enhanced features are available, we’ll let you know. Just tap See Update when the alert appears on the screen.
If you want to wait to update, tap Later. When you’re ready to update, tap Firmware Update in the ![]() menu.
menu.
Updates can take a few minutes, so leave the app open and make sure the mobile device screen does not lock to ensure completion of the download. During an update, the app will display the progress and the approximate time remaining.
WHICH VERSION DO I HAVE?
To find out what version of the app you have, open the Haiku Home app, tap ![]() , and select Settings. The app version can be found under the About heading.
, and select Settings. The app version can be found under the About heading.
To check your Haiku product firmware version, tap ![]() and select Firmware Update from the menu.
and select Firmware Update from the menu.
How do I update my Haiku account information?
IOS
- In the Haiku app, tap , and then tap your name/email at the top of the menu.
- Tap your account name at the top of this screen, and then tap Update Profile.
- Enter your password, and then tap OK.
- Update your information, and then tap Save.
ANDROID
- In the Haiku app, tap , and then tap your name at the top of the menu.
- Tap the button in the top right corner of this screen, then select Update Profile.
- Enter your password, then tap OK.
- Update your information, then tap the check button to confirm.
The fan jerks upon startup.
This is normal and may happen occasionally upon startup. An initial slight jerking forward and backward does not affect fan operation.
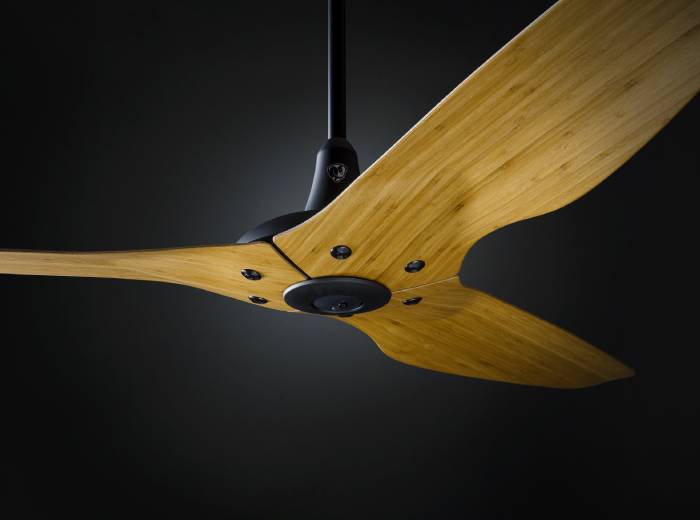
My airfoils are damaged, or I want a different color or size. Can you send me a new set?
Each fan goes through a rigorous balancing process during which the airfoils and motor are uniquely paired. Changing airfoils requires a full fan replacement to maintain proper balance and functionality.
I forgot my Haiku account password.
To reset your Haiku account password:
- In the Haiku app, tap , and then tap Smart Home Integration (iOS) or Integrations (Android).
- If you are signed in:
- iOS: Tap your account name at the top of the screen, and then tap Sign Out.
- Android: Tap the button in the top right corner, then tap Sign Out.
- Tap Sign In, and then tap Forgot your password?
- Enter your email address, and then tap Next.
- Open your email to retrieve the 4-digit PIN. Return to the Haiku Home app, enter the PIN, and then tap Next.
- Enter your new password, and then tap Reset Password.
The fan motor is not level with the extension tube. How do I fix this?
- Raise the lower cover to expose where the motor connects.
- Loosen the hex bolt at the bottom of the extension tube with a 5mm hex key.
- Adjust the motor until it’s level, and then tighten the hex bolt.
How do I change the battery in my Haiku remote?
Haiku Premium Remote: Remove the battery cover and the back of the remote. Remove and replace the AAA batteries. Replace the battery cover and test the remote.
Haiku L/Haiku C Remote: Locate the battery tray on the back of the remote. Squeeze the tab inward while gently pulling the tray out of the remote. Be sure to properly orient the new battery in the tray before installing it back into the remote. Test the remote.
I need a different length of extension tube. Can you send me a new one?
Universal mount fans include 20- and 32-inch extension tubes. A Tall Ceiling Kit that includes 48- and 60-inch extension tubes is available and can be purchased here. Universal mount extension tubes are interchangeable on the fan, but cannot be connected.
If you have a Low Profile or Standard Mount, the extension tubes cannot be changed. If your fan requires a different mount type, the fan must be exchanged.
My fan will not start.
- Ensure that your fan is receiving power.
- Check your circuit breaker or fuse and wall switch for functionality.
- Make sure that all wires are securely connected and the fan is properly wired and grounded.
My fan is noisy during operation.
- Check all mounting and fan hardware. If loose, tighten. If you are unsure of how to do this, refer to the installation guide:
- Bring the fan to a complete stop. Gently turn the airfoils by hand, making sure there are no fan parts rubbing on the motor unit when the fan rotates.
- If your fan uses the universal mount, lower the wiring cover and make sure the wedge is tightly secured in the mounting ball.
My fan is wobbling during operation.
- Remove the airfoils (Haiku Indoor/Outdoor) or the lower cover (Haiku I Series).
- Make sure the colored dot sticker on each airfoil matches the sticker on the motor hub.
- If the stickers don’t match, move the airfoils to the matching attachment points.
- If they already match, continue reading.
- Make sure the gaps between each airfoil are the same.
- If your fan was installed with the universal mount, make sure the mounting ball wedge has been installed and it is seated in the correct position. Verify the wedge screw is tight against the ball.
- Make sure all mounting hardware is tight.
- Make sure the airfoils are properly aligned and are securely fastened to the fan hub.
I have a ceiling angle greater than 33 degrees. Do I need to do anything special?
For extreme ceiling angles, a cathedral ceiling adapter or “bird box” will allow you to set a base on which to install your Haiku fan.
Do you install locally?
Sorry, no. Please contact Customer Service for assistance.
Can I connect multiple extension tubes that came in the box to get a longer hanging length?
No, only a single extension tube can be used to hang your Haiku fan. The tubes are interchangeable on the fan, but cannot be connected.
- Haiku, Haiku I Series: Universal mount fans include 20- and 32-inch extension tubes. A Tall Ceiling Kit that includes 48- and 60-inch extension tubes is available and can be purchased here.
- Haiku L: 6- and 12-inch extension tubes are included with Haiku L fans. Optional lengths can be purchased and are packaged separately. The maximum length is 64 inches.
- Haiku C: 6- and 12-inch extension tubes are included with Haiku C fans.
If you have a Low Profile or Standard Mount, the extension tubes cannot be changed. If your fan requires a different mount type, the fan must be exchanged.